Delicious Lemon Brownies

Lemon Brownies 7

I love getting a bag of lemons given to me, our wee tree is getting there but only have 3 lemons from it so far! The next decision is what to make with them. A few months ago Pinterest was full of Lemon Brownie recipes, I was intrigued – I am a little slow on the uptake but I finally made them today and they are delicious! Lovely lemony smell filling the house and a lovely fresh alternative to our decadent chocolate brownie you will find elsewhere on my blog.

Lemon Brownies 6

In all I used 5 small lemons, you may need less – using both the zest and the juice – this recipe includes a lovely drizzly lemon glaze which adds to the taste and texture of the Yellowie (totally think it should be a word – if its not already I’ll claim it!) Different varieties of lemons have a different taste to both the zest and juice – Meyer lemons are often the most popular as they are not as tart, but any lemons will do.


Ingredients

3/4 cup Sugar
115g Butter
3/4 cup Plain Flour
1/4 tsp Salt
2 large eggs
2 Tbsp Lemon Zest
2 Tbsp Lemon Juice

Lemon Glaze

1 heaped cup Icing Sugar
4 tsp lemon zest
1/3 cup Lemon Juice (adding a little at a time)

Lemon Brownie 1

Method

Pre Heat oven to 170C.

Prepare a 25 x 25 cm baking tin or slice pan with baking paper or grease well and set aside.

Prepare your zest (using smallest side of grater) and lemon juice and set aside.

Using an electric mixer cream the butter and sugar until pale and creamy (approx 2-3 minutes), add flour and salt and combine well.

In a separate bowl whisk together the eggs, lemon juice and lemon zest. Pour this into the flour mixture and beat at a medium speed until smooth and creamy – up to 2 minutes more.

Pour into the prepared baking pan and bake for 20-25 minutes (check at 20). The brownies edges should only just begin to go golden and a skewer in the centre will come out clean. Ensure you do not overbake it or it will be dry 🙂

Lemon Brownie 2

Prepare Lemon Icing Glaze once the slice has cooled completely.

In a small bowl add the icing sugar (sifted if required) lemon zest and slowly add the lemon juice until you get the desired consistency – should be able to pour easily but not too runny. You can do this glaze in two layers if you would like a thicker layer – simply allow a few minutes to set in between pouring next half of mixture.

Lemon Brownies 3

Cut into small squares and serve. Store in an airtight container.

Lemon Brownie 10

Thanks for stopping by to check out this recipe – look up the top of the page for my Sweet Treats Tab for more delicious recipes and lots of fun kids activities too.

Lemon Brownie 5

You can follow me on Facebook or Twitter, or register your email address above left to receive posts as I publish them.

Lemon Brownies 8

Have a wonderful day – Happy Baking – I would love to hear your comments or let me know when you make it and how it turned out 🙂

Anna 🙂

Top mommy blog<<<<<< See this picture above left? Please click on it to register a vote for my blog. Ta 🙂

Grandma’s Chocolate Squares

Grandmas Chocolate Squares

I was blessed to know my wonderful Grandma into my early 20’s until she passed. She was a busy Wife to a Sheep Farmer, a Mother to seven, a Grandma to 21 and by now would be a Great Grandma to lots & lots of Great Grandchildren!

She was very special to me and some of the fondest memories I have of her are baking and preparing meals for her family & grandchildren and I am delighted to have many of her recipes, passed on by my Mum who was her eldest daughter.

Grandmas Chocolate Slice

My mum has been making this slice for years, it is so  tasty, a simple slice to prepare and a great one to whip up quickly with basic ingredients.


Ingredients

115g butter
1 Cup Sugar
1 egg
1 Cup Flour
1 tsp Baking Powder
3 tsp Cocoa
1 Cup Coconut
1 Cup Sultanas

Basic Chocolate Icing

1   1/2 Cups Icing Sugar
1 Heaped Tbsp Cocoa
1 tsp Melted Butter
1/2 tsp Vanilla
1-2 Tbsp Hot Water

Method

Preheat Oven to 170C.

Cream butter and sugar together until pale and creamy.

Add egg to butter mixture and beat in well.

Add Flour, Baking Powder, Cocoa, Coconut and Sultanas and mix until well combined.

Pour into a greased or lined slice tin (18 x 27cm) and press down until smooth. The lined tin works best as easy to lift out once cooled.

Bake for 25 minutes.

You need to ice slice while still warm. To prepare the icing combine the icing sugar, cocoa, butter and vanilla in a medium bowl. Add the water a little at a time until you get the desired consistency. Once removed from oven spread the icing over the still warm (but not hot) slice until it is evenly covered, it will melt onto the slice so a little goes further.

You can decorate with a sprinkling of coconut or chocolate hail if desired once iced.

Remove slice from pan once cooled and cut into small squares. Store in an airtight container.

Chocolate Slice


Thanks so much for checking out this lovely family recipe. To keep up to date with my latest recipes you can Like me on Facebook or Twitter or register your email to receive the latest posts from the blog as they are published. Check out above left for the right places to click!

😀 Anna

Top mommy blog<<<<<<See this picture above left? I would love it if you could click on it and spread the love 🙂

Feijoa Loaf …….. And Cake!

feijoa loaf 9

We are inundated with feijoas this Autumn, we never know what sort of crop we will get from our trees but maybe the abundance of bees & wasps this year meant things did what they should!

Everything you ever wanted to know about feijoas can be found online – but here in NZ they are a pretty acquired taste – people either love them or hate them, and even those that love them do not always think they should then be used in baking!

Feijoa Loaf 2

As I received an extra bag of these from a local farm  I thought I best find some recipes to use – and came across this loaf in a few different places online, no idea where the original is from but it has been around for years. I put my own spin on it and a few modifications to make it even nicer.

I doubled this recipe and made it as both a loaf and a cake with lemon icing – then took it to a few taste testers and the general consensus was the cake with lemon icing was nicer – but then my kids and husband prefer the loaf and both were enjoyed at a recent coffee morning.

It is best to use really ripe fruit as I think it will add more flavour – be generous with the fruit portions for extra yumminess.

Ingredients

1 heaped cup peeled and sliced feijoas – riper the better
1 cup boiling water
1 cup sugar
50g butter
2 cups flour
1 teaspoon baking powder
1 teaspoon baking soda
1 egg, beaten
Walnut Pieces (Optional) I used half a cup, gave a lovely texture and taste

Method

Heat Oven to 180C

Prepare loaf pan with cooking spray or line with baking paper (I also cooked the cake in a ring tin).

In a saucepan add the feijoas, boiling water, sugar, butter and heat until boiling, then gently boil for 5 minutes, remove from heat and allow to cool.

Feijoa Loaf 3

Carefully stir in the dry ingredients, egg and walnuts if using.

Mix until dry ingredients are just moistened, pour into prepared tin and bake. The original recipe stated to bake for 45-60 minutes – mine was done in 30, so do check after 25 minutes to assess cooking times in your oven. The loaf is ready when it springs back to the touch, and a knife or skewer comes out clean.

feijoa loaf 4 feijoa loaf 7

Allow to cool slightly then remove to a cooling rack. I iced the cake with a lemon icing which was a nice contrast to the delicate flavour of the cake. Was my basic vanilla icing, but with lemon used to moisten instead of water, could also add some fresh lemon zest. Serve the loaf in thick slices with butter.

Store in an airtight container for up to 4 days.

feijoa loaf 8

There will be more Feijoa recipes coming your way – this was nice but I am sure there are more around for me to test.

You can follow me on Facebook, Twitter or add your email above to receive my latest blog posts as they come up, or check out the Sweet Treats Tab above for more lovely recipes.

Have a super day, 🙂

Grandma’s Microwave Chocolate Cake

Microwave Chocolate CakeOne of my earliest baking memories is of this cake made by my Grandma – well not so much the cake, or even if I helped make it – but of the crumbs left in the cake tin! When you remove the cake from the tin it leaves little traces of soft moist cake behind – and it is those little traces of cake crumb that are my most enduring memory of this cake – and the best bit is that 20-30 years later it still tastes the very same!

Grandma's Microwave Chocolate Cake 3

The next most important point to make is this cake cooked in 5  1/2 minutes!!! So at any given point you are only around 10-15 minutes away from a whole chocolate cake – forget tasteless cakes in a mug – this is real cake, whole cake, cooked in no time at all 😉

This was definitely trial and error – the original recipe said to cook on medium for 10 minutes – so I thought I would try 40% for 10 minutes – and well suffice to say I now know how to make rock cake!

So second time around I went with fullpower and 4 minutes – eventually cooking for a further 1  1/2 minutes – each microwave will vary so I recommend starting at 4 minutes and going for 30-60 second increments until it bounces back to the touch and a skewer or knife comes out clean.

You will need a microwave proof cake tin – I have the original old ring tin but I see you can get them online and in some stores still.

Grandma's Microwave Chocolate Cake 1

Ingredients

1  1/2 cups Flour
1 Cup Sugar
3 heaped Tablespoons Cocoa
1 tsp Baking Soda
1 tsp Baking Powder
2 Eggs
1 Cup Milk
1 Cup Oil
3 Tbsp Golden Syrup

Method

Spray or line the microwave proof cake tin (I used a ring tin) It does leave a fine crumb behind but you can always use a circle of baking paper in the bottom of the ring to avoid losing the top of your cake.

Combine the dry ingredients in a large bowl and combine well.

Add the wet ingredients to the dry, and combine well – I used a whisk to ensure it was all well combined.

Pour into the prepared cake tin, pop into the microwave and cook on high for 4 minutes, then check and cook for 30-60 second increments it bounces back to the touch and a skewer or knife comes out clean. It took 5 1/2 minutes in our 1100w microwave.

Grandma's Microwave Chocolate Cake 2

Allow cake to cool in the tin then remove onto a rack ready to ice once cold.

Grandma's Microwave Chocolate Cake 6

To ice I used my basic Chocolate Icing Recipe

Ingredients

1 1/2 cups icing sugar
1 heaped dessertspoon of cocoa
1 tsp vanilla
1 – 2 tsp butter melted

Method

Combine all of the above ingredients in a bowl and slowly add water a teaspoon or two at a time until you have the desired consistency, I just drizzle it straight from the tap a wee bit at a time.

Spread over cooled cake and store in an airtight container for up to 3 days.

Microwave Chocolate Cake

I hope you enjoy this special recipe from my Grandma, I was so pleased to remember it and even better that my Mum was able to dig it up.

For more Grandma Recipes – check out my Sweet Treats Tab, stop by my Facebook page or Twitter to follow my latest recipes or you can follow this blog via your email address above too.

http://www.facebook.com/justamumnz
http://www.twitter.com/justamumnz

Thanks for stopping by 🙂

Grandma’s Recipe – Banana Cake

Banana Cake 7
I was blessed to know my wonderful Grandma into my early 20’s until she passed from Cancer. She was a Wife to a Sheep Farmer, a Mother to seven, a Grandma to 21 and by now would be a Great Grandma to lots & lots of Great Grandchildren!

She was very special to me and some of the fondest memories I have of her are baking and preparing meals for her family & grandchildren and I am delighted to have many of her recipes, passed on by my Mum who was her eldest daughter.

This is one of the first recipes I made as an adult and continue to make often to this day always with her in my heart. Whenever bananas go past their best I pop them in the freezer – you can then get the bananas out a few hours before you need them, or you can even thaw them in the microwave if you are pressed for time – they don’t look great but they taste amazing in baking!

Banana Cake 6

It is such a simple recipe and can be made into a cake or muffins, its lovely, light and moist and freezes well.

Grandma’s Banana Cake

Ingredients

4 oz butter (112g)
6 oz sugar (168g)
2 eggs
2 mashed bananas
2 Tbsp hot milk
1 tsp baking soda
8 oz flour (224g)
1 tsp baking powder

Banana Cake 1

Method

Cream the butter  & sugar until smooth and creamy. Add the eggs and mashed banana and beat well.

Banana Cake 2

Heat the milk in the microwave for 10-13 seconds until hot – then add 1 tsp baking soda and mix until frothy and add this to the mixture and blend well.

Banana Cake 3

Add the flour and baking powder and mix well.

Banana cake 5

Put batter into a greased cake tin & cook – my memories are always of this being done in a round ring tin so that is what I always use, but any baking tin will do and I spray it with cooking spray to prepare it. Cook for 25-30 minutes at 200C (390F) Cake is done once a skewer or knife comes out clean.

Banana Cake 4

Ice cake once cooled – store in airtight container. You can freeze the un-iced cake for up to 3 months.

Ice with any icing you desire – chocolate or vanilla is nice. I usually do my basic vanilla icing for this cake.

Banana Cake 7

Basic Vanilla Icing

2 Cups Icing Sugar
1 tsp vanilla essence
1 tsp melted butter
Small amount water

Combine the icing sugar, vanilla & butter into a bowl and mix well. (Sift icing sugar if not smooth, or whisk to remove lumps) Carefully add a teaspoon of water at a time to the mixture until you get the desired consistency.

Banana Cake 6

I hope you enjoy this simple but tasty recipe and it becomes a family favourite for you too. 🙂

Thanks for stopping by – feel free to sign up to follow my blog or LIKE me on Facebook to hear about more recipes & fun kids activities.

http://www.facebook.com/justamumnz
http://www.twitter.com/justamum

Have a wonderful day 🙂

Buttercream Icing Recipe – Step by Step

Buttercream Icing 1
I thought I would share a more step by step process for making buttercream icing – there are many recipes out there but there are a few tips & tricks that make it easier and once you have made it a few times it’s easy to get the hang of!

Disclaimer – I am Just a Mum! I am no expert and have learnt what I know from making my kids birthday cakes not culinary school! There are plenty of other experts around for you to look at, this is just my take on it! 😉

When I was making sure my recipe was the same as others out there I noticed that there are many variations to quantities, so this is my recipe I have always used but the processes are the same regardless of what amounts you prefer.

Buttercream Icing 9

I used standard butter here but I often use vegetable shortening from our local kitchen store Chef’s Complements if I need the icing to be pure white as our butter here in NZ means the icing still retains a creamy/yellowy colour at best.

The first tip is that you will need either an electric hand beater, food processor or food mixer for best results. You need to really whip the butter to get it creamy and pale and its near impossible to do it by hand.

Ingredients

125g softened butter
1 1/2 Cups Icing Sugar (you are supposed to sift I never do!)
2 TBSP milk
1 tsp vanilla
Food Colouring

Buttercream Icing 2

I recommend using the best icing sugar you can find – some brands are definitely better than others and will effect the outcome. Also you use imitation vanilla essence but you will need to use more for flavour than a quality vanilla. Taste as you go for the flavour you prefer.

Buttercream Icing 3

Soften the butter in the microwave in short bursts to get it to just softened stage, not melted, 10 seconds at a time.

Add the butter to a large bowl and begin to blend on high until it begins to go pale and creamy – approx. 2-5 minutes

Buttercream Icing 4

Add half of your icing sugar and mix well again for at least 60 seconds – I find by adding this first portion of icing sugar and mixing it allows me to get a paler colour as the mixing blades have more to work with.

Add the last measure of icing sugar, milk, vanilla and food colouring. I doubled the recipe today so I added the icing sugar in 3 stages, adding milk to the last two stages. Continue to add food colouring a few drops at a time until you get the desired colour. Try not to overmix too much once all ingredients are together to avoid overly aerated icing.

Buttercream Icing 5

Once the colour and consistency is right prepare your piping bag.

There are so many piping bag sets available, you can buy them for only a few dollars to more expensive brands, and even reusable ones are available at supermarkets – with a bit of practise I find it’s easier to pipe decorations onto a cake than it is to try and get smooth icing!

Buttercream Icing 6

I usually use a plate to practise on before I ice onto the cake – this allows me time to get the feel of how to hold the bag – and also make sure I am happy with the tip I am using, try out a few different ones to see which one you like the best. Today I wanted to try something I have not done before with my Magical Orange Cake, I see all the errors but really I am sure it looks ok! Icing is pretty forgiving and you can always scrape bits off or just do your best and no one will be the wiser.

Buttercream Icing 7

When icing with a piping bag make sure you twist the top tightly and that no air is trapped in the bag and that you have a firm grip on the bag itself – there are lots of tutorials on YouTube for easy fancy ways to decorate so check them out!

Buttercream Icing 9

If you have any questions please do not hesitate to ask and I will see if I can help.

I hope you have enjoyed this Just a Mum ‘How To’ – icing kids cakes is such a simple way to delight them on special occasions.

Thanks for checking out my recipe today – you can follow me on Facebook or Twitter for more recipes & fun kids activities. Invite your friends along too!

Have a great day and happy icing! 🙂

Buttercream Icing 8

Chima Lego Party – Invitations & Cupcakes

Chima Party 11My 9 year old is obsessed with Chima Lego, it has totally reignited his interest in his Lego which was waning as he got older. So when it came to his birthday party there was no question he would want Chima to be a part of it somehow!

As it was a pool party there was no games or fancy foods so we were limited to what needed to be Chima themed so we simply went with invites & cupcakes to show his love!

Now the tricky part- we are on a budget and there is not much Chima related stuff out there to purchase in NZ anyway as it is still relatively new. So we decided to get creative and make our own invitations & simply do cupcakes with Chima icing tokens on the top – easy!

I will share with you what I did here. I am not a party planning expert, not an arty crafty Mummy, nothing looks professional, its super homemade and I’m not a trained cake maker – I am Just a Mum!

Chima Party 1

First the invites – after much Googling and looking at our options we went with making our own. We do not have many fancy photoshop apps so just used what we had in Microsoft paint and it turned out ok!

Using an image of one of the characters from Google images we added writing to it using Paint on the computer, printed these and cut around them

Chima Party 5Chima Party 6


Then again using images of the characters we printed small ones and cut these into circles to pop on the envelopes – easy! Computer, printer, paper, ink, glue, envelopes, done!

Chima Party 2 Chima Party 3

That done we looked up what to do with the cake. This was to be a super simple pool party so I didn’t want to spent hours creating a custom character so decided cupcakes & icing toppers would be the easiest way to go. After searching Trade Me (similar to eBay) I found someone who makes these and for $11 I got myself 24 images to use.

I made my Easy Rich Chocolate Cupcakes the day before and then the night before the party I made blue butter cream icing, then using the blue pearls I purchased to look like Chi and the toppers we were good to go! I also made gluten free cupcakes using my Vanilla Cupcakes recipe replacing the flour with Gluten Free flour, also Gluten Free baking powder.

Chima Party 8 Chima Party 9

So in the end it worked out super well, kids liked the invites, loved the cupcakes and I managed to have a lovely stress free party using my sons favourite theme!

This can so easily be done with any theme you can think of, if you have any questions please do not hesitate to let me know!

Thanks for checking out my blog, comments & likes make us bloggers feel super so let me know what you think!

Have a lovely happy day 🙂

The Things You Do for Your Kids….

So its birthday time in our happy household, our eldest is turning 9 tomorrow!!! I cannot believe it and more so it makes me aware just how long it has been since I have had a ‘real’ job!!

Anyway, more to the point it means parties, cakes, gifts & me trying to find my arty crafty gene which I fear is sorely lacking.

The main party is in a weeks time at our local hot pools – they will have a blast and it will be easy for me, lollies, chips, cupcakes and sausages on the BBQ – the laziest party I have done to date but they are 9 yr old boys and will not care at all what I feed them after 49 times up and down the hydro-slide.

But tomorrow is the actual day and even though it will just be us I thought I would make him a cake to make it feel special, next week is all Lego Chima themed so I decided I would make the next best thing for him – a Pittsburgh Penguins NHL cake. Sounds easy right – I have the figurines and lots of photos to work from. All this sounds great, except one small thing – almost no experience or skills with fondant, a complete lack of the afore mentioned arty crafty gene and its late, I’m tired and its a cake that only 8 people will ever see – oh and you guys.

Anywho, as expected everything that could go wrong did go wrong – my husband was concerned about the slightly hysterical laughing coming from my direction – shall I share my disasters with you

1. The fondant kept sticking to the table…..did I learn….oh no I did not….it happened 4 times!
2. Once I got it on the cake – how on earth do you make fondant corners???
3. The red colouring would only turn the fondant pink….makes sense I guess
4. The red fondant was a pain in my &*( to try and cut & stick in the shapes I wanted
5. So I went to red gel…..ugh I do not even want to talk about this gel stuff.
6. I stupidly decided to use blue gel for the rest…..see #5
7. The brush I used to spread the gel shed bristles EVERYWHERE – using a fine needle I spent 20 minutes removing over 30 tiny brush bits!!!
8. The buttercream I made to pipe around the base to cover the bad fondant work would not turn black – at best a light grey before I ran out of black food colouring!
9. Then the final triumph was the piping bag burst at the seams and I ended up covered in yellow butter cream but determined to just get it done!

However, I finished it – I even took a photo for your amusement – not a close up you must understand I have some pride – but I feel it my duty to share with you so now you know that most Mums are just normal folk making bad cakes in a effort to make their kids happy & amuse random strangers on blogs.

Oh the shame – here tis’

Penguin Cake


For more of my fails and occasional wins – please LIKE me on www.facebook.com/justamumnz

Puppy Dog Cupcakes!

dog cupcakes

How cute are these! They were perfect for my puppy loving daughter on her third birthday – a little fiddly and certainly looked nothing like the expert ones but we loved them!

I found this in an old copy of New Idea so credit goes to them or who ever made up the concept.

I will pop here the cupcake recipe they recommend but you could also use my Easy Rich Chocolate Cake recipe – check it out on here https://justamumnz.wordpress.com/2014/01/20/awesome-easy-rich-chocolate-cake/

Basic Chocolate Cupcake Recipe

Ingredients for Cupcakes

100 g unsalted butter, at room temperature
1/2 cup caster sugar
1 tsp vanilla essence
2 eggs
1/2 cup self raising flour
1/4 cup cocoa powder
1/3 cup milk

Method for Cupcakes

  1. Line a 12-hold muffin pan with paper cases
  2. Beat butter, sugar and essence with an electric mixer until fluffy. Beat in eggs one at a time. Add combined sifted flour and cocoa with milk, in two batches. Stir until just combined. Divide evenly among cases
  3. Cook in a moderate oven (180C) for 20 minutes or until cooked. Transfer to a wire rack to cool.

Ingredients for Icing

125g unsalted butter at room temperature
1 1/3 cups icing sugar
2 TBSP cocoa powder
20 Jersey Caramels
6 marshmallows, halved horizontally
Queens White Writing & Decorating Fudge
12 mini M&Ms
12 Black Jelly Beans
6 pink or red jelly beans – halved

Method for Icing & Decorating

  1. To make icing, beat butter with an electric mixer until light and fluffy. Beat in icing sugar and sifted cocoa powder until combined.
  2. To make ears, place half the caramels on a microwave safe plate. Microwave on high power for 10-15 seconds or until just softened. Knead until smooth. roll out between two sheets of baking paper until 3mm thick. Using kitchen scissors, cut out 24 small triangles. Set aside
  3. Repeat with the remaining caramels. Cut out 12 circles using a 5cm-round cutter.
  4. Spread icing evenly over cakes. Arrange caramel triangles on cakes for ears. Arrange caramel triangles on cakes for ears. To make muzzle, place marshmallow halves on cakes. Drape caramel circles over top. Using white fudge as glue, attach mini M&Ms and jellybeans.

I would love to see your attempts at these so post a photo to my FB page if you do! http://www.facebook.com/justamumnz

Happy Baking 🙂

Easy Magical Orange Cake

Buttercream Icing 7

This cake is super easy – made all in the food processor in under 5 minutes! Basically chuck it all in – blend and bake! Guess that is what makes it magical – a yummy moist cake with a gorgeous citrus flavour.

Magical Orange Cake 1

Ingredients

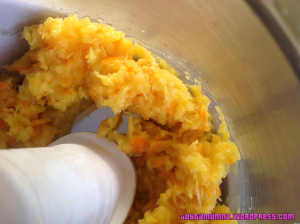
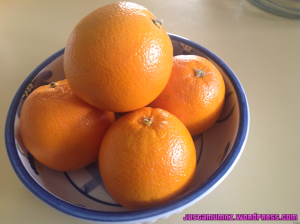
1 whole orange – washed & pulped, skin and all! (I remove the green stalk bit)
125g melted butter
1 Cup sugar
2 medium eggs
1 1/2 cups self raising flour

Method:

I quarter and pulp the orange first in the food processor, then pop in the butter, sugar, eggs & self raising flour and mix until just combined.

Magical Orange Cake 2

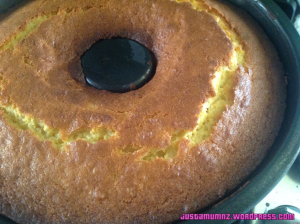
Pour into a lined or greased cake tin and bake for approx. 30-40 minutes at 180C (355F), testing with a skewer and once skewer comes out clean you are done, or cake bounces back at the touch!

Magical Orange cake 3

I often make this as a base for my cupcakes, it is a lovely sweet treat with an easy vanilla icing, or you could easily make it as a loaf with an orange syrup glaze.

Magical Orange Cake 4

This cake is a little overcooked – don’t do that, be better than me and don’t get distracted! 😉

Easy Vanilla Icing

1 1/2 cups icing sugar
1/2 to 1 tsp vanilla essense
1 tsp melted butter

Add tiny amounts of water until you get the desired consistency – just add more icing sugar if you add to much water, spread on the cake or cupcakes once cooled.

I  have used my Buttercream Icing recipe for the photos on this page – recipe here https://justamumnz.wordpress.com/2014/02/28/buttercream-icing-recipe-step-by-step/

Magical Orange Cake 10

Thanks for taking the time to read this quick recipe – please feel free to like & share.

Oranges

Follow me on Facebook to keep up to date with new recipes, fun kids activities and Mum musings. https://www.facebook.com/justamumnz or on twitter www.twitter.com/justamumnz

Enjoy 😀